| I am a big fan of Octopus Deploy and used it many times to release applications. But Microsoft has been quite busy over the last few years making VSTS Release Management a real competitor for Octopus Deploy and I’m using it more and more for deployments these days. In this blog I’ll describe how you can easily deploy an ASP.NET Web App to Azure App Service and your database to an SQL database within Azure using Entity Framework Migrations. |
|

Build your application
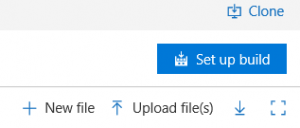 First of all, we need an application to deploy. You can of course use your own or use the one I’m using in this blog, you’ll find it here. I’m assuming you’ve a Git repo within VSTS to which you have pushed the app. Go to VSTS and go to your repo. In the right top corner, you’ll find a button saying ‘Set up build’. Once you push this button you’ll be asked to choose a template. Pick ASP.NET (Preview) and hit Apply. Your build will be created with a couple of default steps. We’ll go through a couple of them.The next three copy tasks will copy files we need to update our database during a release. Before we dive into the details you’ll have to enter, let’s have a look at some of these files and see why we need them. On the left, you find an image which shows the content of the SimpleMVCApp.data project which you can find in my Github repo. As you can see there’s my FruitContext, a models folder and a migrations folder. These are all standard components which should look familiar when you’ve ever worked with EF and migrations. What’s extra is het Scripts folder in which you find a PowerShell file called MigrateDatabase.ps1. This script is quite simple and shown below.
Param(
  [Parameter(Mandatory=$true)]
  [string]$connectionString
)

.\migrate.exe SimpleMVCApp.Data.dll /connectionString="$($connectionString)" /connectionProviderName="System.Data.SqlClient"
The first lines define the connectionstring parameter. We will define this when we setup our release definition. The last line is where the work is done. Here we are using migrate.exe and pass in some arguments. The first argument is the dll in which your context and migrations reside, the other arguments are self-explanatory. You may wonder where this migrate.exe comes from. This was downloaded when you installed the EF NuGet package and can be found in packages\EntityFramework.6.1.3\tools. This .exe is also used when you use the Package Manager Console in Visual Studio and issue an Update-Database command. We get this from the package folder to make sure it’s always up to date. If you update EF in your project, this file will be updated as well. In EF there’s an option to have your database migrated from code using AutomaticMigrationsEnabled = true;. I decided not to use this and do this during a release. A very important reason for this is visibility. Doing it during a release means that whatever migrate.exe returns is gets logged and is visible for everyone. When the migration fails this also means the deployment will fail. Below you find the three copy tasks you’ll need.
ADFBEELDING 4, 5 , 6 Last thing you should do is go to the triggers tab and enable Continuous Integration. This will cause your build to trigger whenever someone commits anything new to this repository.
AFBEELDING 7
Deploy to Azure
Now that we’re done with the build we’ll go on with the release. Go to the release tab en click on the plus, create release definition. The template window will appear, select ‘Azure App Service Deployment’. Name your environment Test. On the left, click on 'Add artifact' and select the build we've just created. The output of this build will now be the input for this release pipeline. Click ‘1 phase, 1 task’. Here you’ll see one task already added, we will now add three more. Add two tasks to manage our resources on Azure: ‘Azure Resource Group Deployment’. The first one will be used to create the App Service. Select your Subscription and enter a Resouce group name. You should create a variable for this one since we will need to enter a different value when we deploy to a different environment. Under Template you should select the website.json from the templates folder we copied earlier. Select website.parameters.json under Template parameters. The last thing we’ll do in this task is override some template parameters:
-hostingPlanName $(hostingPlanName) -webSiteName $(webSiteName) -aiLocation "$(aiLocation)"
Create and migrate the database
The second Azure Deployment task will create our database on Azure. Again, select your subscription and enter a resource group name. Select database.json as a template and enter the following parameters overrides:
-databaseName $(DatabaseName) -edition "Basic" -requestedServiceObjectiveId dd6d99bb-f193-4ec1-86f2-43d3bccbc49c -maxSizeBytes 2147483648 -serverName $(DatabaseServerName) -serverLocation "West Europe"
As third task add a ‘PowerShell Script’ task. This will run the MigrateDatabase.ps1 we looked at earlier. Select this file under Script path and enter ‘-connectionString "$(DatabaseConnectionString)"’ as Arguments. You should off course create a variable for ‘DatabaseConnectionString’ and make sure you mark your password as a private field.
Deploy the application
The last task in this process was already there; Deploy your Azure App Service. Choose your Azure subscription and create a variable for the App Service name. The 'Package or folder' field should point to the drop location specified during the build: '$(System.DefaultWorkingDirectory)/SimpleMvcApp/drop'.
Configuration
Of course you need different configuration for each environment you promote your application to. This could easily be done using your web.config files. Click on ‘File Transforms & Variable Substitution Options’ and both ‘XML transformation’ and ‘XML variable substitution’. The first one will make sure that your web.config files will be transformed. For instance, you’ve just created an environment called Test. You’ll probably have settings for this environment in a web.test.config. During the release, your web.config will be transformed with this web.test.config. In order to make this work you should remove the Dependend Upon tags for your web.*.config files in your project file. This will cause them to show up right beneath your web.config. Also make sure you set the build action to Content in the properties menu to make sure these files end up in your deployment package. Last but not lease, if you have ‘<compilation xdt:Transform="RemoveAttributes(debug)" />’ in your web.*.config, then be sure to replace this with ‘<compilation targetFramework="4.5" xdt:Transform="Replace" />’. During the build your web.config will be transformed with your web.release.config. So, your web.config will no longer contain a debug element during the release and using RemoveAttributes will cause an error. The 'XML variable substitution' checkbox is there to enable replacement of appSettings in your web.config with variables you define in VSTS. For example, I've defined an appSetting 'ApplicationVersion'. In VSTS I created a variable with the same name and gave it value of '$(Build.BuildNumber)'. During the release, the setting in the web.config will now be replaced by the buildnumber. The last thing we should do is enable the Continuous deployment trigger. Go to the pipeline tab, click on the right button and click enable. Now your release will automatically start whenever your build succeeds. We should be all done now so go on and trigger a build. When all goes well, there should be a new database and App Service have been created for you and your website should be up and running!
.png?width=450&height=450&mode=crop)