OpenFaas is a Serverless framework that runs on top of Kubernetes. This is how the creators of OpenFaas describe their mission: "The mission of OpenFaaS is to Make Serverless Functions Simple. It can be run on any cloud through the use of portable Docker containers without the fear of getting locked-in or having to manage complex infrastructure." In this blog I'll show you how you can quickly deploy a Kubernetes cluster with Rancher to run OpenFaas!
Prepare your environment

So, before we can run OpenFaas we first need a Kubernetes cluster. The easiest way to build one is by use of Rancher. Rancher itself runs in a Docker container and it will spin up Kubernetes in containers as well. First, you will need to create a few virtual machines. I’ve used 4 of them running Ubuntu 18.04 on Parallels for Mac (You'll need the pro version because you'll need nested virtualisation). The first vm will run Rancher and the Kubernetes master and etcd, the other three will be Kubernetes workers. Don’t mix Rancher with a Kubernetes worker. That won’t work because both of them need port 80. Install Ubuntu using all the default settings, enable ssh. I gave the first vm 4Gb of ram, the three workers get 2. All of them use Shared Networking which gives them a private DHCP provided ip-address and internet access. Once Ubuntu has been installed, I use the docker installation script which can be found here to install the latest version of Docker.
curl -fsSL https://get.docker.com -o get-docker.sh
sh get-docker.sh
Kubernetes Cluster
Log in to the first machine. Installing Rancher is nothing more than running a container. Run the following command:
sudo docker run -d --restart=unless-stopped -p 80:80 -p 443:443 rancher/rancher:latest
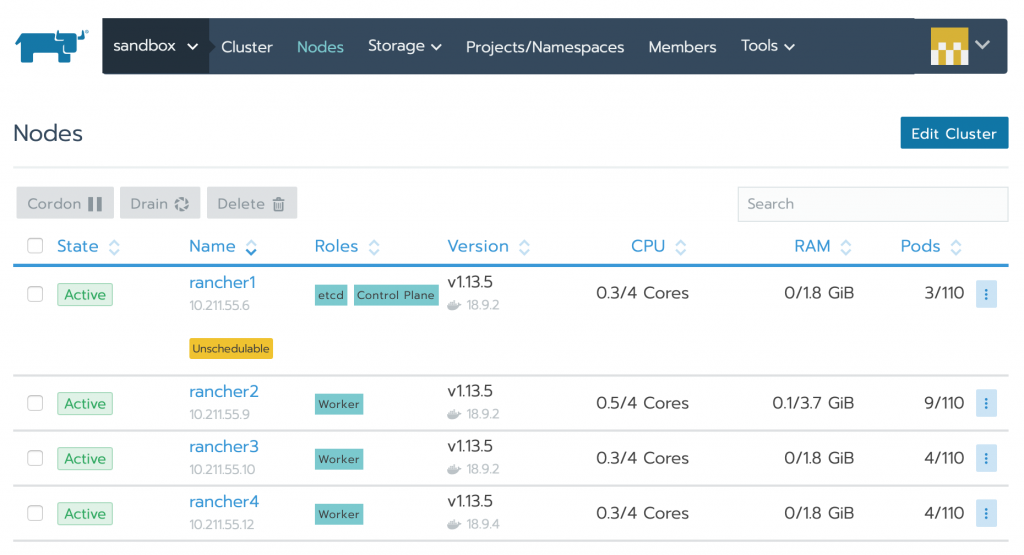
It will take some time for Rancher to download and start. Once it does, open your browser and navigate to the ip of the first vm. The Rancher UI will appear and ask you to set a username and password. In the next step it will ask for the address of the server, the ip-address is ok for now. Now it’s time to create the Kubernetes cluster. Click on ‘Add Cluster’ in the upper right corner. Choose 'Custom' and enter a cluster name. The rest of the settings can be left untouched. Now it’s time to create the master, etcd and workers. First, check both the master and etcd checkboxes and copy the command. Run this command on the first vm which also runs Rancher. Wait for it to start. Once it did, make sure you only checked the worker box and copy the command again. Run it on the other three vm’s. You cluster is up and running! That was easy, right?!
Next up: run OpenFaas! OpenFaas is not available in the library of Racher so we will need to install it by hand. This is not do difficult however. First we need to install Kubectl on one of the vm’s. Log in to one of the vm’s and install kubectl using:
sudo snap install kubectl --classic
There’s a few ways to provide your clusters config to kubectl. I’ll be using the –kubeconfig commandline argument. To do this we need to create a config file. I created one in my home directory called rancher.conf. Go to rancher, open your cluster and click ‘Kubeconfig file’ in the upper right corner. Scroll down and click ‘Copy to clipboard’. Paste this in your rancher.conf. Now clone the following OpenFaas repo and move to that directory using
git clone https://github.com/openfaas/faas-netes
cd faas-netes
Deploy the OpenFass yml files using:
sudo kubectl apply -f namespaces.yml --kubeconfig /home/<username>/rancher.conf

sudo kubectl apply -f faas-netes/.yml --kubeconfig /home/<username>/rancher.conf
!Important!
Installing OpenFaas using these YAML files is only suited for development and is not recommended for production environments. Please use the instructions listed here to set up your production environment.
Go to Projects/Namespaces and you will something similar:
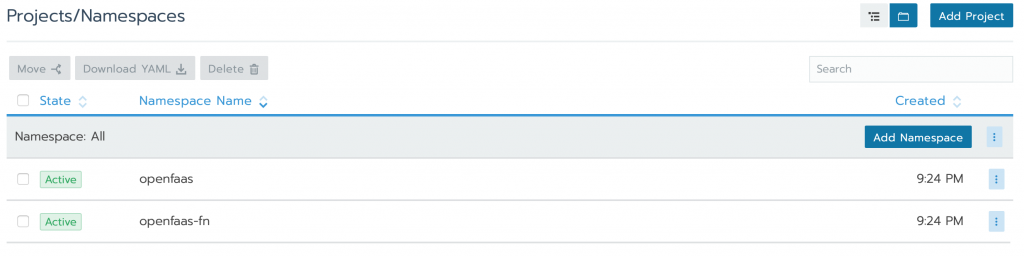
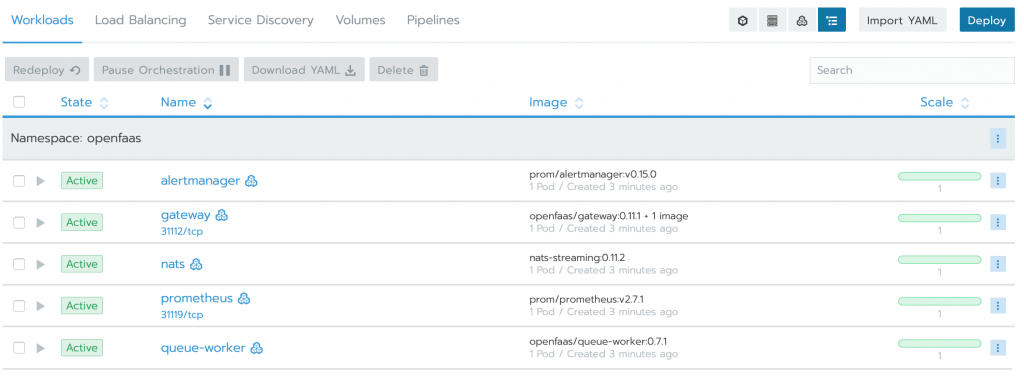
Add a new project, call it OpenFaas and add the two OpenFaas namespaces to it by using the move features of Rancher. Now click on the new project, you’ll be seeing the current workload in the project:
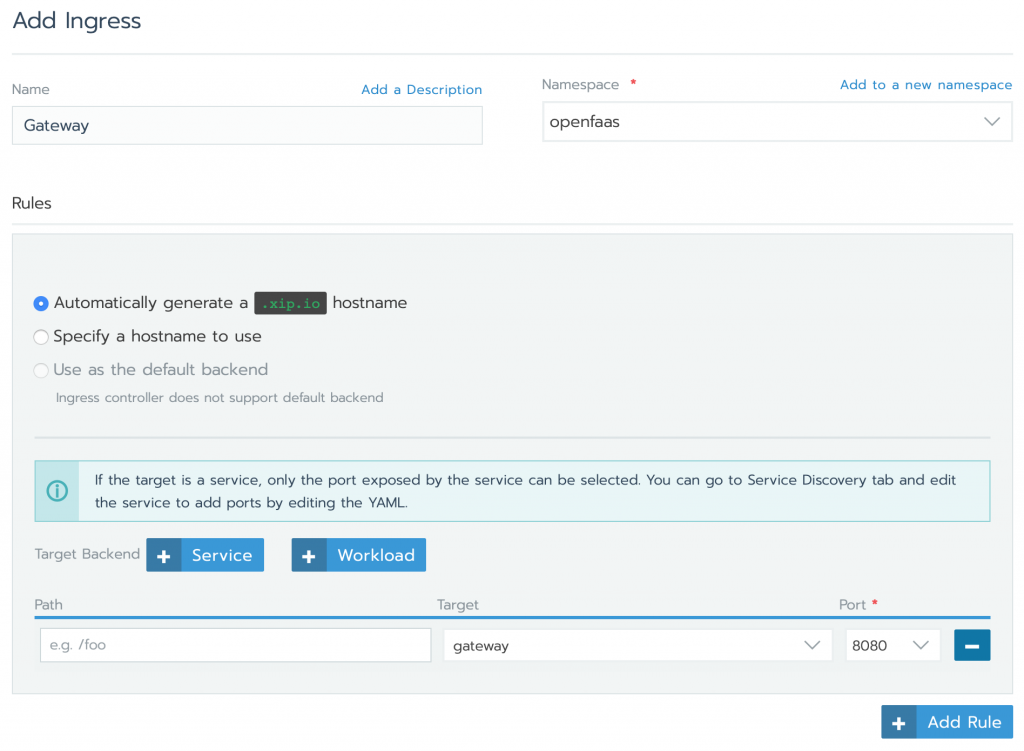
The OpenFaas gateway has a simple but nice UI. To be able to access it we first need to add an Ingress. Click ‘Load balancing’ and then ‘Add Ingress’. Name it ‘gateway’ and add a Service target backend. Select gateway as the service and select its port.
After the ingress has been initialised you should be able to click the link that looks similar to mine and open the OpenFaas UI: gateway.openfaas.10.211.55.10.xip.io
Great! OpenFaas is running. In the next blog I will describe how to create and deploy your first serverless function using .net core and c#.
.png?width=450&height=450&mode=crop)