
In my previous blog I described how to set-up OpenFaas on a Kubernetes cluster with a little help from Rancher. Now it’s time to deploy our first serverless function. In this blog we’ll create and deploy a .NET Core function that reads a bit of config using both an environment variable and Kubernetes secrets.
Creating your first function
In the previous blog we installed the OpenFaas cli. If you didn’t already, here are the instructions. Create a new directory.
mkdir yourfirstfunction
cd yourfirstfunction
Now run the following command to create the function
faas-cli new yourfirstfunction --lang csharp
Run the 'ls' command to view the output. There are two folders, template and yourfirstfunction, and the yourfirstfunction.yml. The yml file describes the function and will be used to build and deploy it. We will see it in more detail in a bit. Open the project in your favorite editor and open the FunctionHandler.cs. This is the entrypoint for this function. Data that comes in will always be present as a string. You’ll probably always post a Json object so let’s add some code to convert the input. I added a simple ‘Person’ model and the Newtonsoft.Json library and pretended to add it to a database.
usingSystem;
usingSystem.Text;
usingNewtonsoft.Json;
namespace Function
{
public class FunctionHandler
{
public string Handle(string input) {
var person = JsonConvert.DeserializeObject<Person>(input);
// Connect to sql and add person...
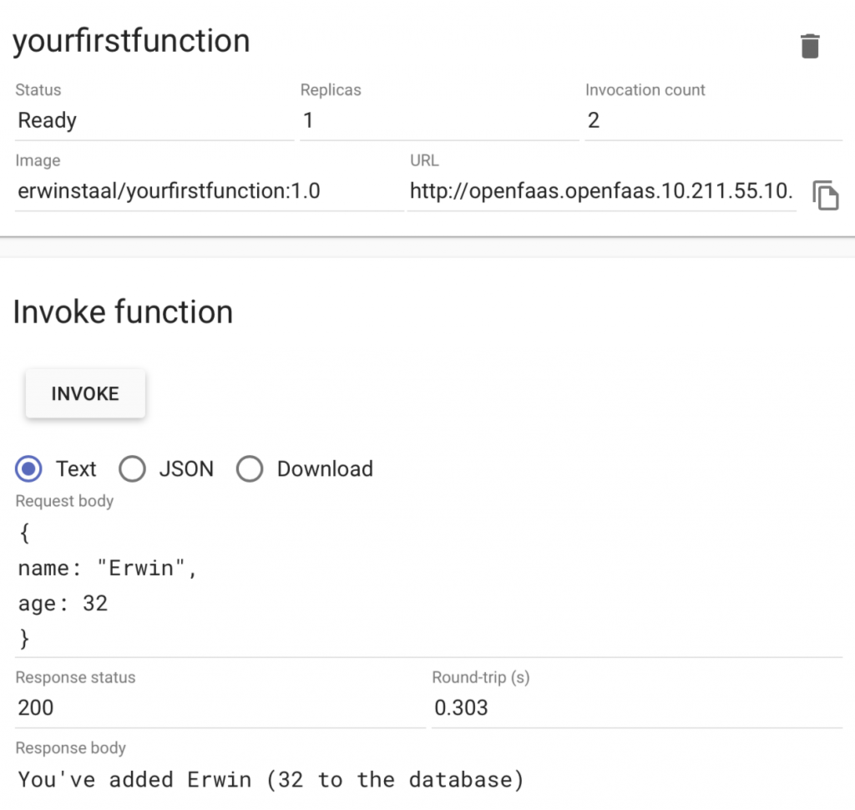
return $"You've added {person.Name} ({person.Age}) to the database\n";
}
}
public class Person
{
public string Name { get; set; }
public int Age { get; set; }
}
}
Before we start adding config like the sql username and password, let’s first deploy and run this function. There are two settings we need to change in the yourfirstfunction.yml before we can do that. First, we have to modify the gateway url to point to OpenFaas on our Kubernets cluster instead of a local instance. Second, we will be pushing the image to Docker Hub so we also need to change the image. Don't forget to change the version of the image. After these changes, this is what my yourfirstfunction.yml looks like:
provider:
  name: faas
  gateway: http://openfaas.openfaas.10.211.55.10.xip.io
functions:
  yourfirstfunction:
    lang: csharp
    handler: ./yourfirstfunction
    image: erwinstaal/yourfirstfunction:1.0
Time to deploy! Run the following three commands, they will explain themselves. Make sure you are logged-in to your Docher Hub account, otherwise the push will not work.
faas-cli build -f ./yourfirstfunction.yml

faas-cli push -f ./yourfirstfunction.yml

faas-cli deploy -f ./yourfirstfunction.yml
Running these three commands every time you wish to redeploy your function isn't ideal, especially when you start adding some repetitive flags to these commands. Luckily, there's also the 'up' command which combines these three commands:
faas-cli up -f ./yourfirstfunction.yml
Open the OpenFaas portal and select the new function. Add some json to the body and hit invoke. You should have a similar result:
One intermezzo before we start adding some config. After the build command a build folder was added to our projects folder. The files from the template folder we saw earlier were used to create this content. Have a look at both the Dockerfile and the program.cs to get a better understanding of what’s going on here with OpenFaas.
Let’s add some config!
Every app needs a little config. OpenFaas supports two ways of retrieving config; environment variables and secrets. We will add one of both in this example. First, let’s change the app to read the config. After the change, this is my function:
public class FunctionHandler
{
public string Handle(string input) {
var person = JsonConvert.DeserializeObject<Person>(input);
// Connect to sql and add person...
var sqlUrl = Environment.GetEnvironmentVariable("database_url");
var sqlPassword = ReadSecret("database-password");
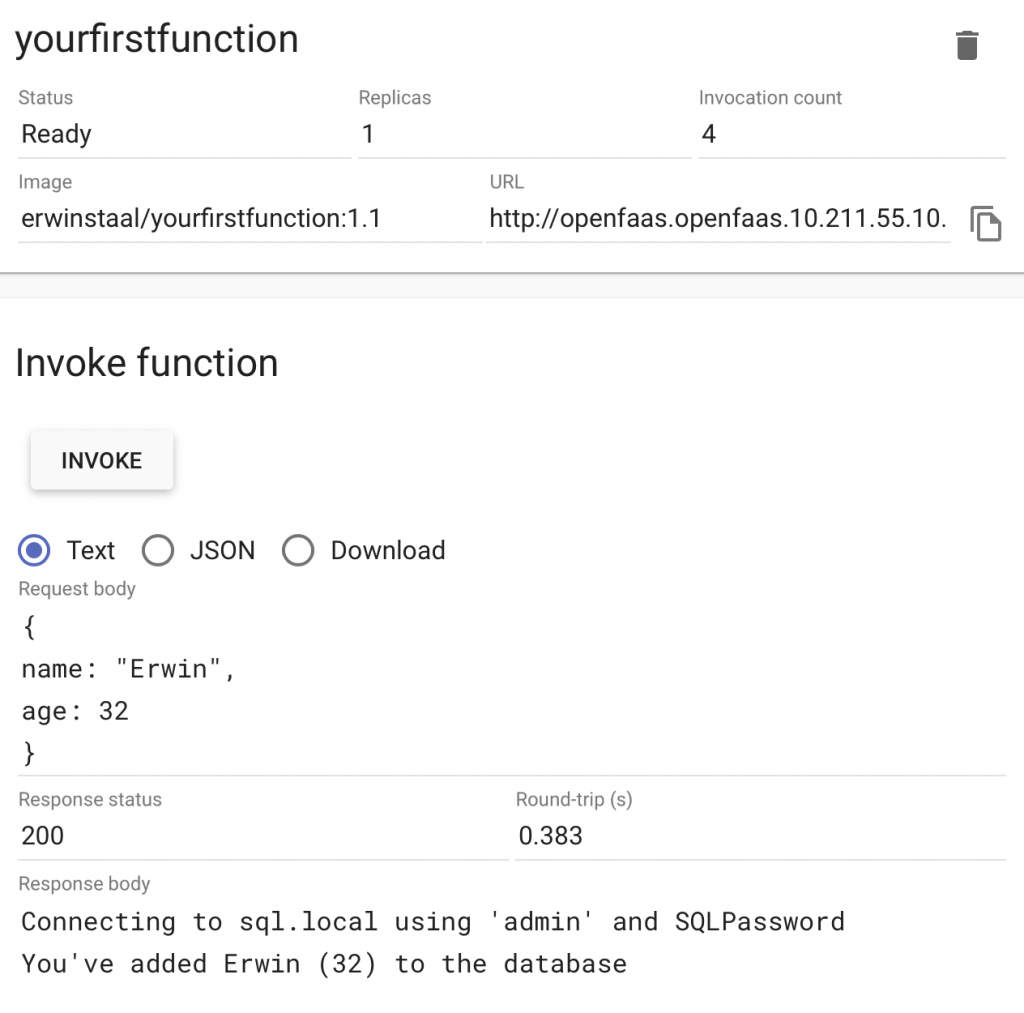
Console.WriteLine($"Connecting to {sqlUrl} using 'admin' and {sqlPassword}");
return $"You've added {person.Name} ({person.Age}) to the database\n";
}
private static string ReadSecret(string secretName)
{
var secret = string.Empty;
try{
secret = File.ReadAllText($"/var/openfaas/secrets/{secretName}").Trim();
}
catch(Exception)
{
Console.WriteLine($"Secret {secretName} could not be read");
}
return secret;
}
}
There’s nothing special about the environment variable. Secrets however are mounted as files to your function at runtime and are always located at /var/openfaas/secrets/{secretName}. Here is a more detailed description of how secrets work in OpenFaas. The blog describes how to add your secret using the command line tooling of Kubernetes, Swarm and even OpenFaas. I’ve used kubectl:
kubectl -n openfaas-fn create secret generic database-password --from-literal=database-password=SQLPassword
Add the following configuration to the yourfirstfunction.yml right under the image tag to add the environment variable and let OpenFaas know which secret to mount.
    environment:
      database_url: http://sql.local
    secrets:
      - database-password
Change the version of the image to 1.1 and redeploy! You’re output should be similar to this:
That's it; your first .Net Core serverless function on OpenFaas. In the next blog I will show you how you can publish a message to a Kafka topic have another function triggered by that and receive the message.
.png?width=450&height=450&mode=crop)